Time Sheets in Glass Factory
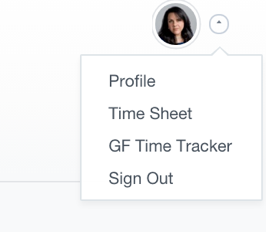
We have created a few different ways to enter in your time, because let's face it, no one likes to do Time Sheets. From your profile screen or your Profile management widget on the upper right you can select from the following:
GF Time Tracker
Time Sheet
Time Report
Each of these methods support full entry of time and comments, we recommend the GF Time Tracker (a desktop app) so you can easily do timesheets without needing to log-in to the website.
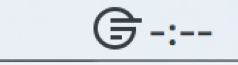
Glass Factory Time Tracker
Glass Factory designed a desktop app to make Time Tracking effortless. From your profile picture on the upper right, click the down arrow and then click "GF Time Tracker".
The Time Tracker will start to download automatically.
Once you have the time tracker .zip file downloaded (look in your downloads folder) install the application to your computer and you will see the Glass Factory logo on your status bar (Mac Only).
To access the desktop app you'll need to log in to your Glass Factory account, click the GF logo icon and the login screen will appear.
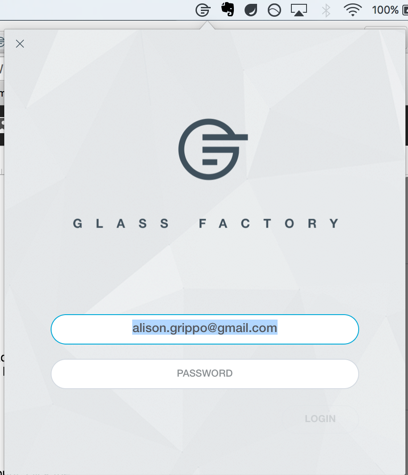
Enter your username and password as you defined it when first logging into Glass Factory.
Entering Time Using the Desktop Tracker
When you log into the tracker you will see a screen that lists all the plans and projects you have been assigned to. If you’re assigned to a plan or project with specific activities you will see that activity as well in your project list.
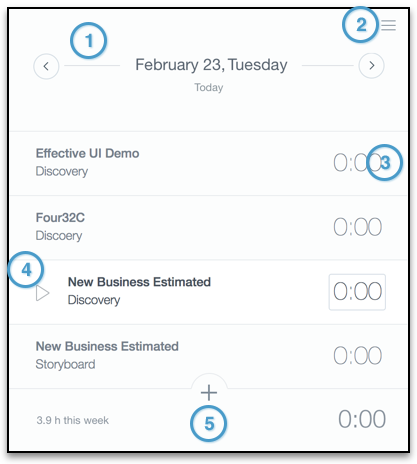
Day Chooser: Glass Factory’s tracker will default to the current day. You can see time and enter time historically as well.
Preferences: Set the app to open at login, and even to notify you with reminders for idle time.
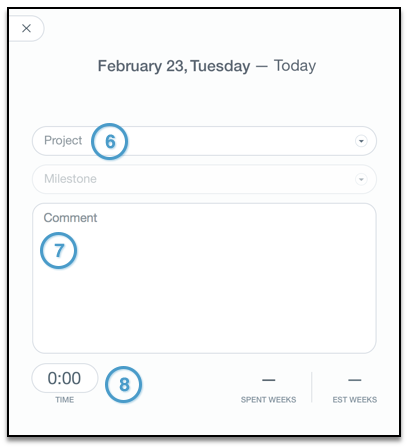
Manual: You can directly enter your time by clicking the time box and entering the value.
Timer Start: Hover over a job you’re working on, then click the “
 “ to start the timer. Glass Factory will time your work on that project until you are complete and then click the arrow again to stop the timer and log the time automatically.
Add Project: Do not see your project? Click the “+” to preform a search for a project that you may not have been assigned to, but need to bill time to.
Project Select: From the pull down you’ll see all the available jobs for billing. Choose a milestone if appropriate to.
Comments: though not required, you can use this to add detail. If you’re using one of our feed integrations this will be populated for you.
Manual: You can directly enter your time by clicking the time box and entering the value.
Entering Time Using the In-tool Timesheets
Form the profile drop-down select “Timesheet” to see the current week’s timesheet list.
The Timesheet screen consists of Cards for each day. You will see a red bar to indicate the current day.
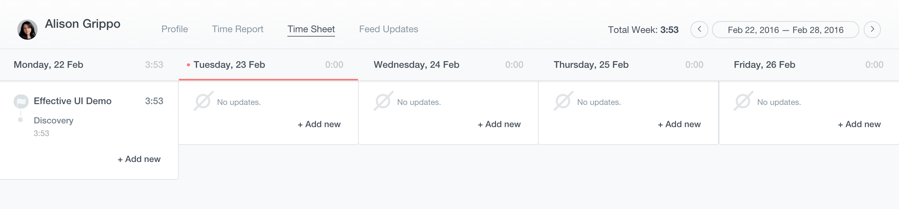
Click the +Add New link to open the time entry drop down.
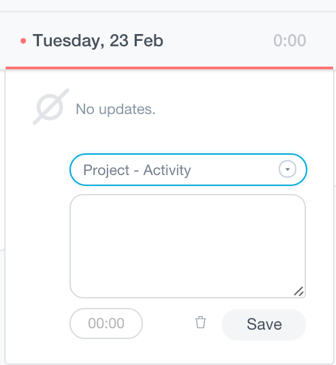
Select the Project or Activity you’re billing time too, the projects you are assigned to will show up for selection.
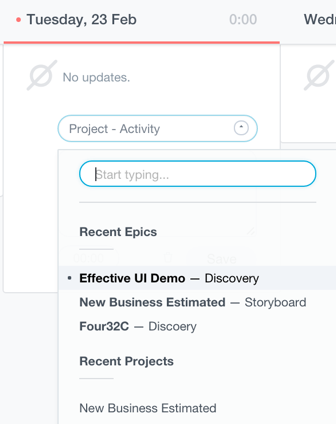
The projects you are allocated to will appear for selection. If you need to bill your time to another job not listed, you can search for the project, select then bill your time.